Fisher-Price trampoline assembly and use instructions
This page pulls together the assembly, daily-use and storage instructions for the UK Fisher-Price trampoline range, written in plain English for parents who may have lost the booklet. It covers the two indoor toddler models, the Junior Trampoline, and the 4.5 ft outdoor safety-net model.
Before you start
- Clear a flat, level space. Indoor models need at least 1.5 m of clear floor around them. The outdoor 4.5 ft model needs ~2 m overhead clearance for the net.
- Remove loose objects. Toys, pets and other children should be clear of the build area.
- Count every part against the parts list in your booklet before starting. It is much easier to get a missing-part replacement sent out before you have partially built the frame.
- Have the right tools to hand. Most models need only a cross-head screwdriver; the 4.5 ft outdoor model includes a spring-pulling tool — use it.
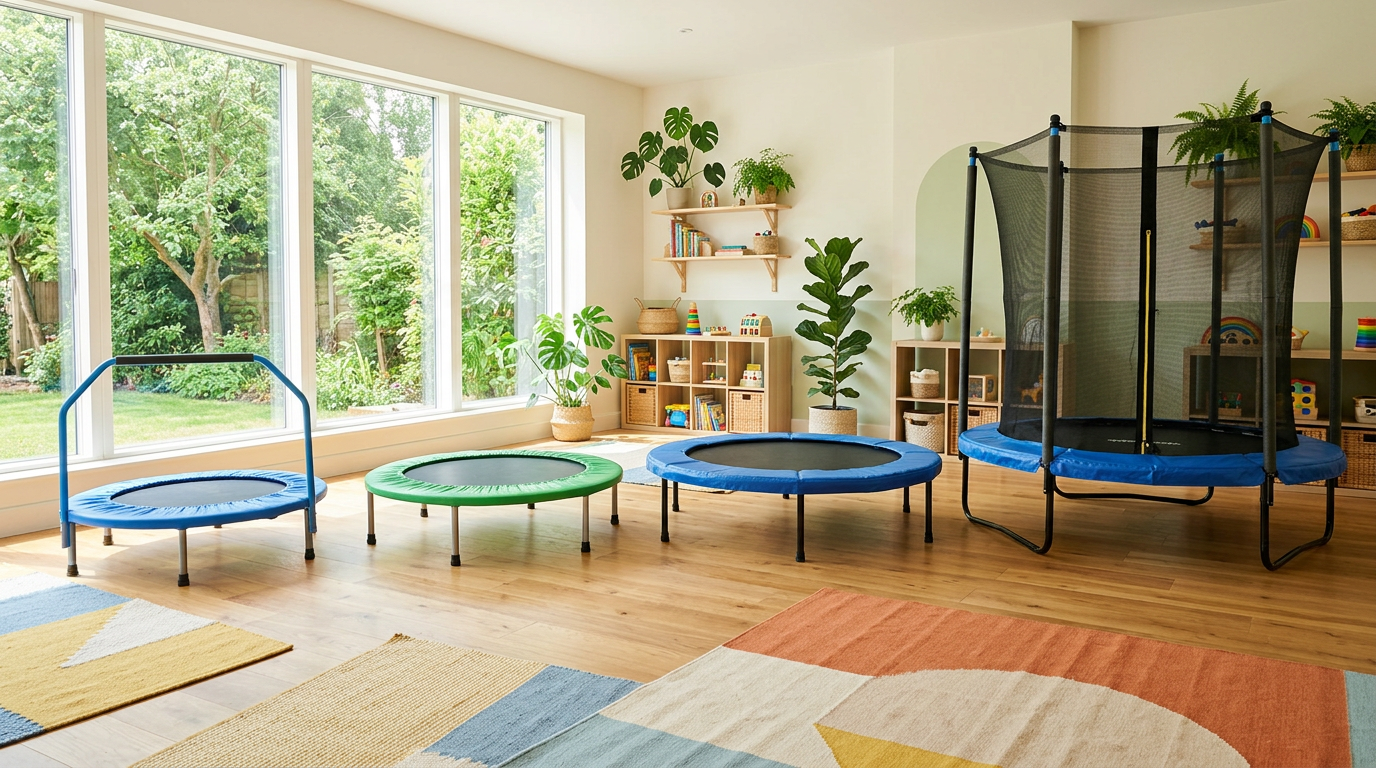
My First Trampoline — assembly
- 1Lay the padded frame flat on the floor, design-side up. The non-slip feet should be pointing down.
- 2Slot the handlebar uprights into the moulded sockets on the frame. They should click firmly into place. If they feel loose, stop and check you have the right uprights.
- 3Attach the padded grip-bar across the top of the uprights. On some variants this is a single-piece bar; on others a two-piece bar joined in the middle.
- 4Press down on the handlebar to confirm it is seated. Children should only use the trampoline once the handle feels firm.
Typical assembly time: 5 to 10 minutes. No tools are needed for most versions of this model.
WonderJump 36-inch — assembly
- 1Attach the six steel legs to the underside of the frame. Most variants use snap-in fittings; some use bolts with pre-attached washers.
- 2Turn the trampoline upright and check every non-slip foot is in contact with the floor. Rock the frame gently — it should not wobble.
- 3Fit the handlebar uprights into the dedicated sockets on the frame. Tighten the clamp screws, then slide on the foam grip sleeves.
- 4Attach the top handlebar crossbar. Confirm the handle is solidly fixed before allowing a child to step on.
Typical assembly time: 10 to 15 minutes. The handlebar is removable — keep the clamp screws in a labelled bag if you take it off for storage.
Junior Trampoline — assembly
- 1Attach the eight legs in pairs to the underside of the frame. The frame should sit evenly when flipped over.
- 2Confirm the jumping mat is evenly tensioned — the springs should sit flat around the frame with no twisted hooks.
- 3Clip the padded safety surround over the springs, ensuring all ties pass under the frame, not over the springs.
- 4Insert the folding handle into the brackets. Confirm the locking pin is fully engaged before use.
4.5 FT Outdoor with safety net — assembly
- 1Assemble the outer ring on flat ground. Join the galvanised steel sections and insert each leg into its T-socket.
- 2Flip the frame upright and lay the mat loosely inside. Starting opposite each other, hook four evenly spaced springs to balance the tension.
- 3Using the spring-pulling tool, fit the remaining springs in a star pattern (opposite pairs) until all are attached. Never work round the frame in a line — this twists the mat.
- 4Fit the padded spring cover over the springs and tie it securely beneath the frame, not around the springs themselves.
- 5Slide the foam sleeves onto each upright pole, then fit the poles into the pole sockets on the frame.
- 6Thread the safety net through the pole caps, fasten the bottom to the spring-pad ties, and confirm the zipped entry closes cleanly.
Typical assembly time: 45 to 60 minutes with two adults. Tighten every bolt once the net is fitted and re-check 24 hours after first use.
Daily use, supervision and storage
Before every session
- Check the mat for tears or worn V-rings.
- Confirm the handle or net zip is secure.
- Remove shoes; non-slip socks only.
During use
- One jumper at a time.
- Direct adult supervision for under-5s.
- No flips, rough play or somersaults.
Indoor storage
- Fold the handle down (Junior) or remove it (WonderJump).
- Stand the trampoline on edge against a wall.
- Keep away from direct heat sources.
Outdoor maintenance
- Anchor in exposed gardens or stormy weather.
- Take the net off for wet winter months.
- Inspect springs and bolts each spring.
Troubleshooting common assembly issues
Even with a well-packaged trampoline, small problems can appear during the build. The most common is a mat that looks slightly off-centre on the 4.5 ft outdoor model. This almost always comes from fitting springs in a continuous ring around the frame instead of in opposite pairs. If you notice a twist after the first few springs, stop and remove them, then restart in a star pattern.
A second frequent issue is a net that will not meet in the middle at the zipped entry. This is normally because one of the bottom net ties is fastened to a spring rather than through the intended loop on the spring pad. Reopen the pad section nearby and re-route the tie; the zip should then close cleanly.
Something wearing out already?
If the mat, spring pad or net is showing signs of wear, the parts guide walks through how to identify and source replacements.
Replacement parts guide